Posts Tagged ‘Offset Header’

10-Pin offset header for Arduino

Friday, June 15th, 2012

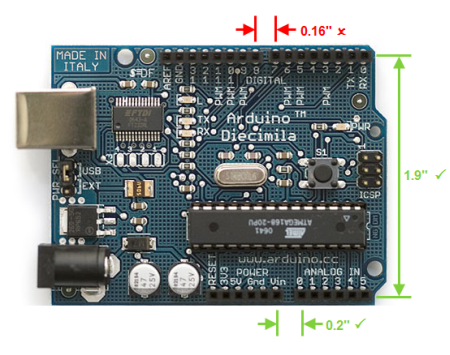
A few years ago, I started making offset headers for the Arduino. These headers allow you to make shields using standard-spaced perfboard, by correcting the shift of that one strangely-placed Arduino header.

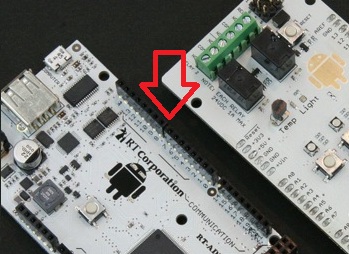
With the introduction of the Leonardo, The Arduino team kept the shift of the header, but added two pins to it.

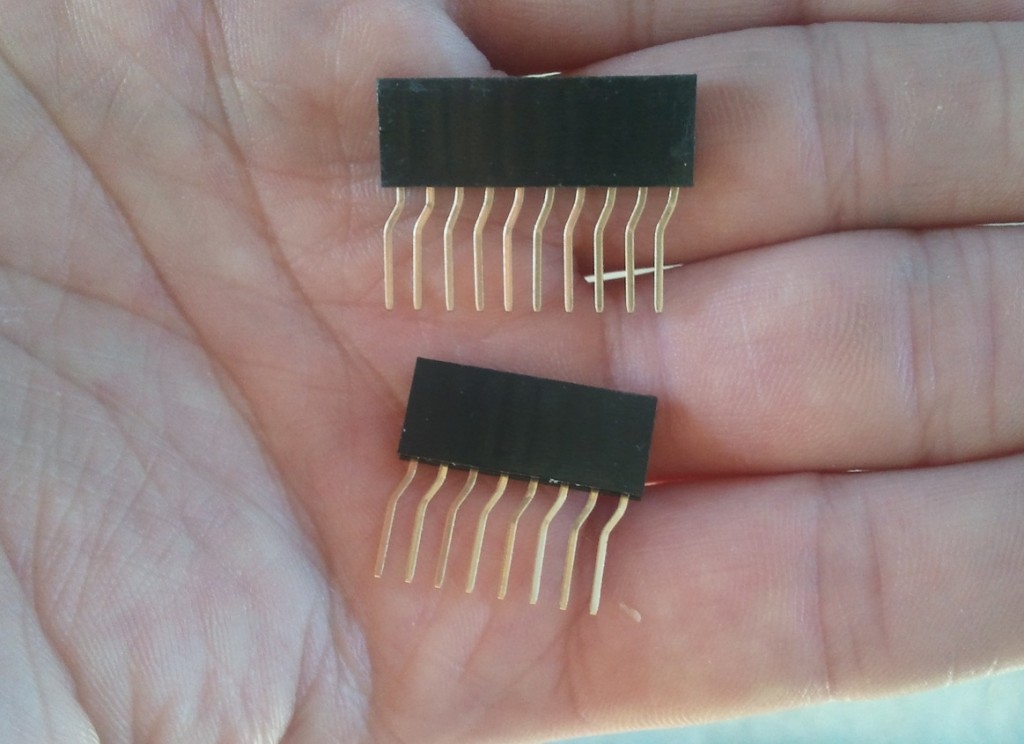
To keep up in this offset header arms race, I ordered some 10-pin headers and modified my fabrication process to accept the two extra pins. I expect these to find their way into the hands of fine retailers over the next couple of months.

flattr this!

Google is Keeping the Offset Header

Wednesday, May 11th, 2011

I have a one-track mind whenever I see a new Arduino variant. My eyes drift to one spot to see if the offset is still there. Naturally I did the same thing when I saw that Google is releasing its own Arduino-type thing

Lo and behold, there’s the telltale gap. I’ll need to look at any schematics they wind up open-sourcing, but I’m fairly certain: Sparkfun will be selling these for a while longer.

flattr this!

Arduino Uno Keeps Header Offset

Monday, September 27th, 2010

Uno Spacing

The newest version of the arduino was announced last week. At first glance it seemed as though they got rid of the offset header spacing, but a closer look at the spec showed that it is still 0.16 inches. It would have been a bold move to change that spacing; there are a lot of 0.16-spaced shields out there. Looks like Sparkfun will be selling offset headers for some time to come.

See also: Offset Header Explained

flattr this!

DIY BBQ Smoke Generator – 2nd and 3rd Attempts

Friday, September 25th, 2009

I’ve had a few more gos at making smoke and, well, there’s still work to be done.

2nd Attempt

not bad for 3 bucks

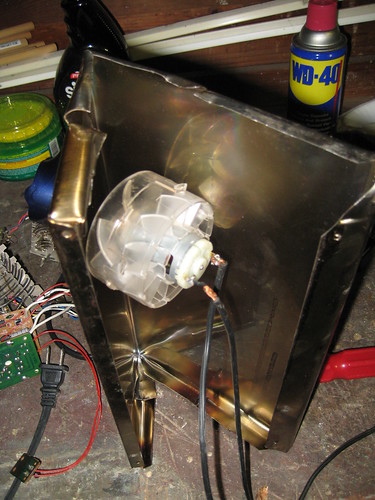
There were two main issues with the first attempt. The smoke was intermittent, and I needed to manually shake the ramp. In the second attempt I tried to take care of both problems with one stroke.  I mounted a fan to the underside of the ramp. This would induce air circulation, and the spinning would vibrate the ramp. I settled on the fan out of a a hair-drier. The idea was appealing for several reasons:

  • An old hair drier is $3 at the thrift store.
  • A hair drier uses 120V AC.  I wouldn’t need a separate source to power it
  • It’s a fan.

Fan mounted to ramp

So I got the fan out and mounted it to the ramp.  It turns out that this idea wasn’t all that good.

  1. Mounting the fan in the middle of the ramp like that did little to improve circulation.
  2. The fan didn’t vibrate all that much
  3. It turns out the motor was actually DC.  They use the heater coil as a resistor to get the voltage they need, then rectify it with a diode.  It’s a brilliant, low cost solution for them.  It was a pain in the butt for me.
  4. The fan was LOUD.  You know, like a hair drier.

So other than learning how a hair drier is wiried, attempt 2 was pretty much a bust. I got the same smoke performance from a louder unit that needed a 12V power supply.

3rd Attempt

The fan didn’t really do much in the second attempt. It didn’t vibrate, and didn’t improve airflow. In the 3rd attempt I tried to fix both problems.

To increase the fan’s vibration, I decided to give it a little off-center weight. Inserting a screw into one of the blades shifted the center of gravity, and made it vibrate like a champ.  This didn’t do anything to help the noise / circulation issues though.  I try to be nice to my neighbors whenever I can, and 4-5 hours of vibrating hair drier noise just isn’t nice.

So I shifted gears. Instead of a constantly vibrating fan with on-off heat, I decided on an intermittent vibrating fan with more consistent heat. Since the initial smoke issues were caused by the On-Off heat control, maybe a more constant heat would lead to constant airflow / smoke. The Fan was relegated to vibration duty, turning on periodically to help the wood settle.
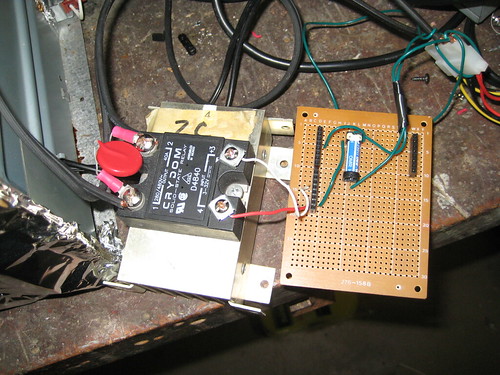
Shield

I built an arduino sheild (yes I used an offset header) to:

  • Send a 25% output to an SSR controlling the heaters. 
  • Vibrate the fan for 5sec every 10 min (more than enough to help the wood settle)

Great plan right?  I got everything set up, saw the smoke start, and walked away for 30 min.  Anyone know what happened next?  Anyone?  Yes.  You in the back.  The heaters added more and more heat to the chamber?  More than the air could remove,  even though the airflow was increasing with temperature?  You’re right!  I had suspected that this might happen, just not so quickly. 

…I came back to a fire.  It was contained within the box, and the box was alone on an a stone patio.  There wasn’t any danger, but the fan was cooked.  damn. Here’s some carnage photos where you can see the vibration screw:

Aftermath

Screw

So What Now?

I was hoping to be able to macgyver my way through this thing using aluminum foil and tape.  I’m going to have to up my game a bit.  In future attempts I’m going to start from overkill and work my way down, rather than the bottom up method I’ve been using.   So that means:

  • Really sealing the chamber.
  • Using an external fan
  • Using dampers to control airflow in and out.
  • Mounting the vibration mechanism OUTSIDE the fire box so it doesn’t get smoke/fire damage
  • More precise temperature control.  That’s right.  PID control.  I said overkill.  I meant it.

flattr this!

Sparkfun Now Carrying Offset Headers

Friday, August 14th, 2009

SparkfunHeader
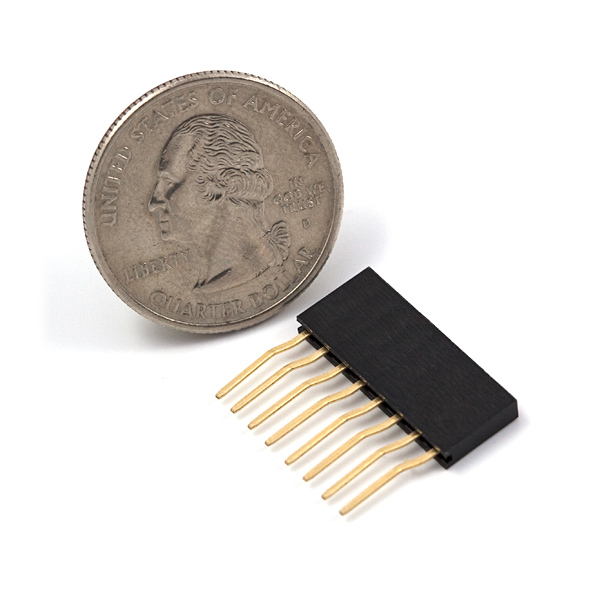
The title says it all. Their picture is much nicer than mine too. That quarter or theirs really gets around.

Here’s a direct link to the product page.

flattr this!

Arduino Offset Header

Thursday, July 16th, 2009

The Arduino has a problem.
dimensions
Not a big problem by any means, but still annoying under certain circumstances. As the story goes, an 11th hour design mistake has left the Arduino community with a header that doesn’t follow standard 0.1″ (2.54mm) spacing.

So what?

misalignment

For the most part, this flaw is completely transparent to the user.  Either they plug wires directly into the header, or use shields that have been designed to mate nicely with it. The problem occurs when trying to create your own shield. When you try to line up a standard perfboard with the Arduino, the header doesn’t match up. This has left the community either buying protoshields or resorting to various other DIY techniques. (here’s two.)

An Easier Solution

Offset Header
offset header - standard shield
Thanks to my hackerspace, I’ve been able to machine a jig to make Offset Headers. In my opinion it’s a great solution to the problem. Slide one through the perfboard (or whatever other 0.1″ spaced board you’re using,) solder in place, and you have an Arduino-spaced shield using a standard-spaced board.

But wait… There’s more

offset header - arduino shield

So that takes care of the cheap-shield issue, but there’s more that this header can do. There are TONS of Arduino-spaced sheilds out there. In my opinion, that’s one of the main things keeping people from developing and buying standard-spaced Arduino clones. Currently, if you make your clone standard-spaced, you’re going to alienate all the existing Arduino shields.  Having these offset headers lets users buy a clone without fear of shield compatibility.

Lastly

Many Headers

So that’s it. Offset headers by the boatload.  Hopefully someone somewhere finds them useful. I’ve sent a preliminary batch over to Adafruit, so they should be available there shortly. 

(UPDATE:  they are now available here)
(UPDATE: SparkFun has them now too.)

flattr this!